Step 1: Access the Automated Pipelines Section
In the left menu, go to Automation -> Automated Pipelines. This will display a list of all pipelines currently available in your agency’s account.
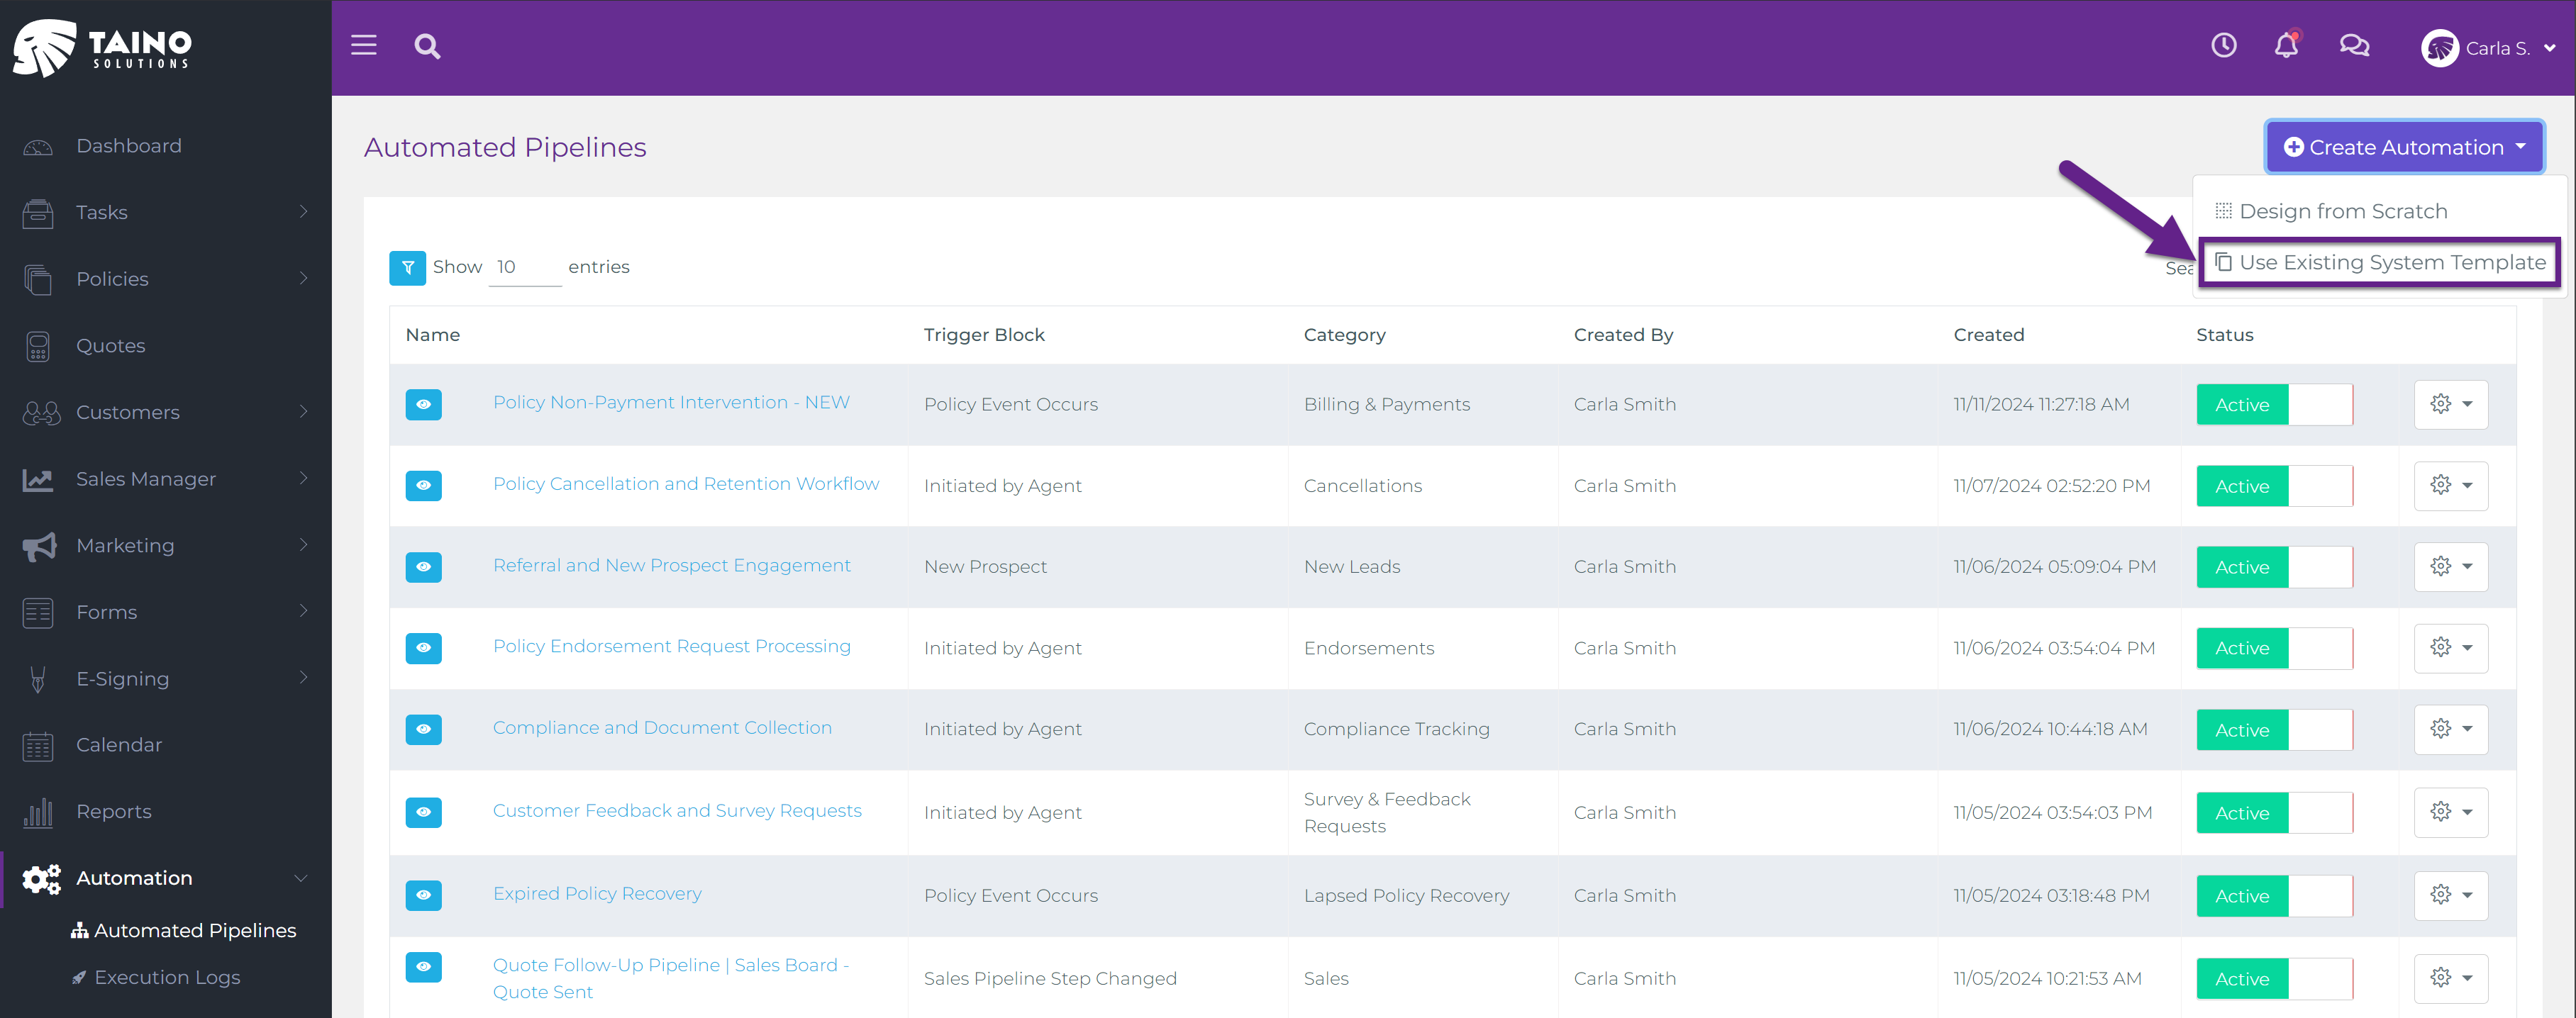
Step 2: Begin Adding a New Pipeline
In the top right corner, click the Create Automation button. A dropdown menu will appear with two options:
- Design from Scratch – for building a pipeline entirely customized to your needs. For detailed steps on designing pipelines from scratch, refer to our Automated Pipelines article.
- Use Existing System Template – for selecting from pre-built templates.
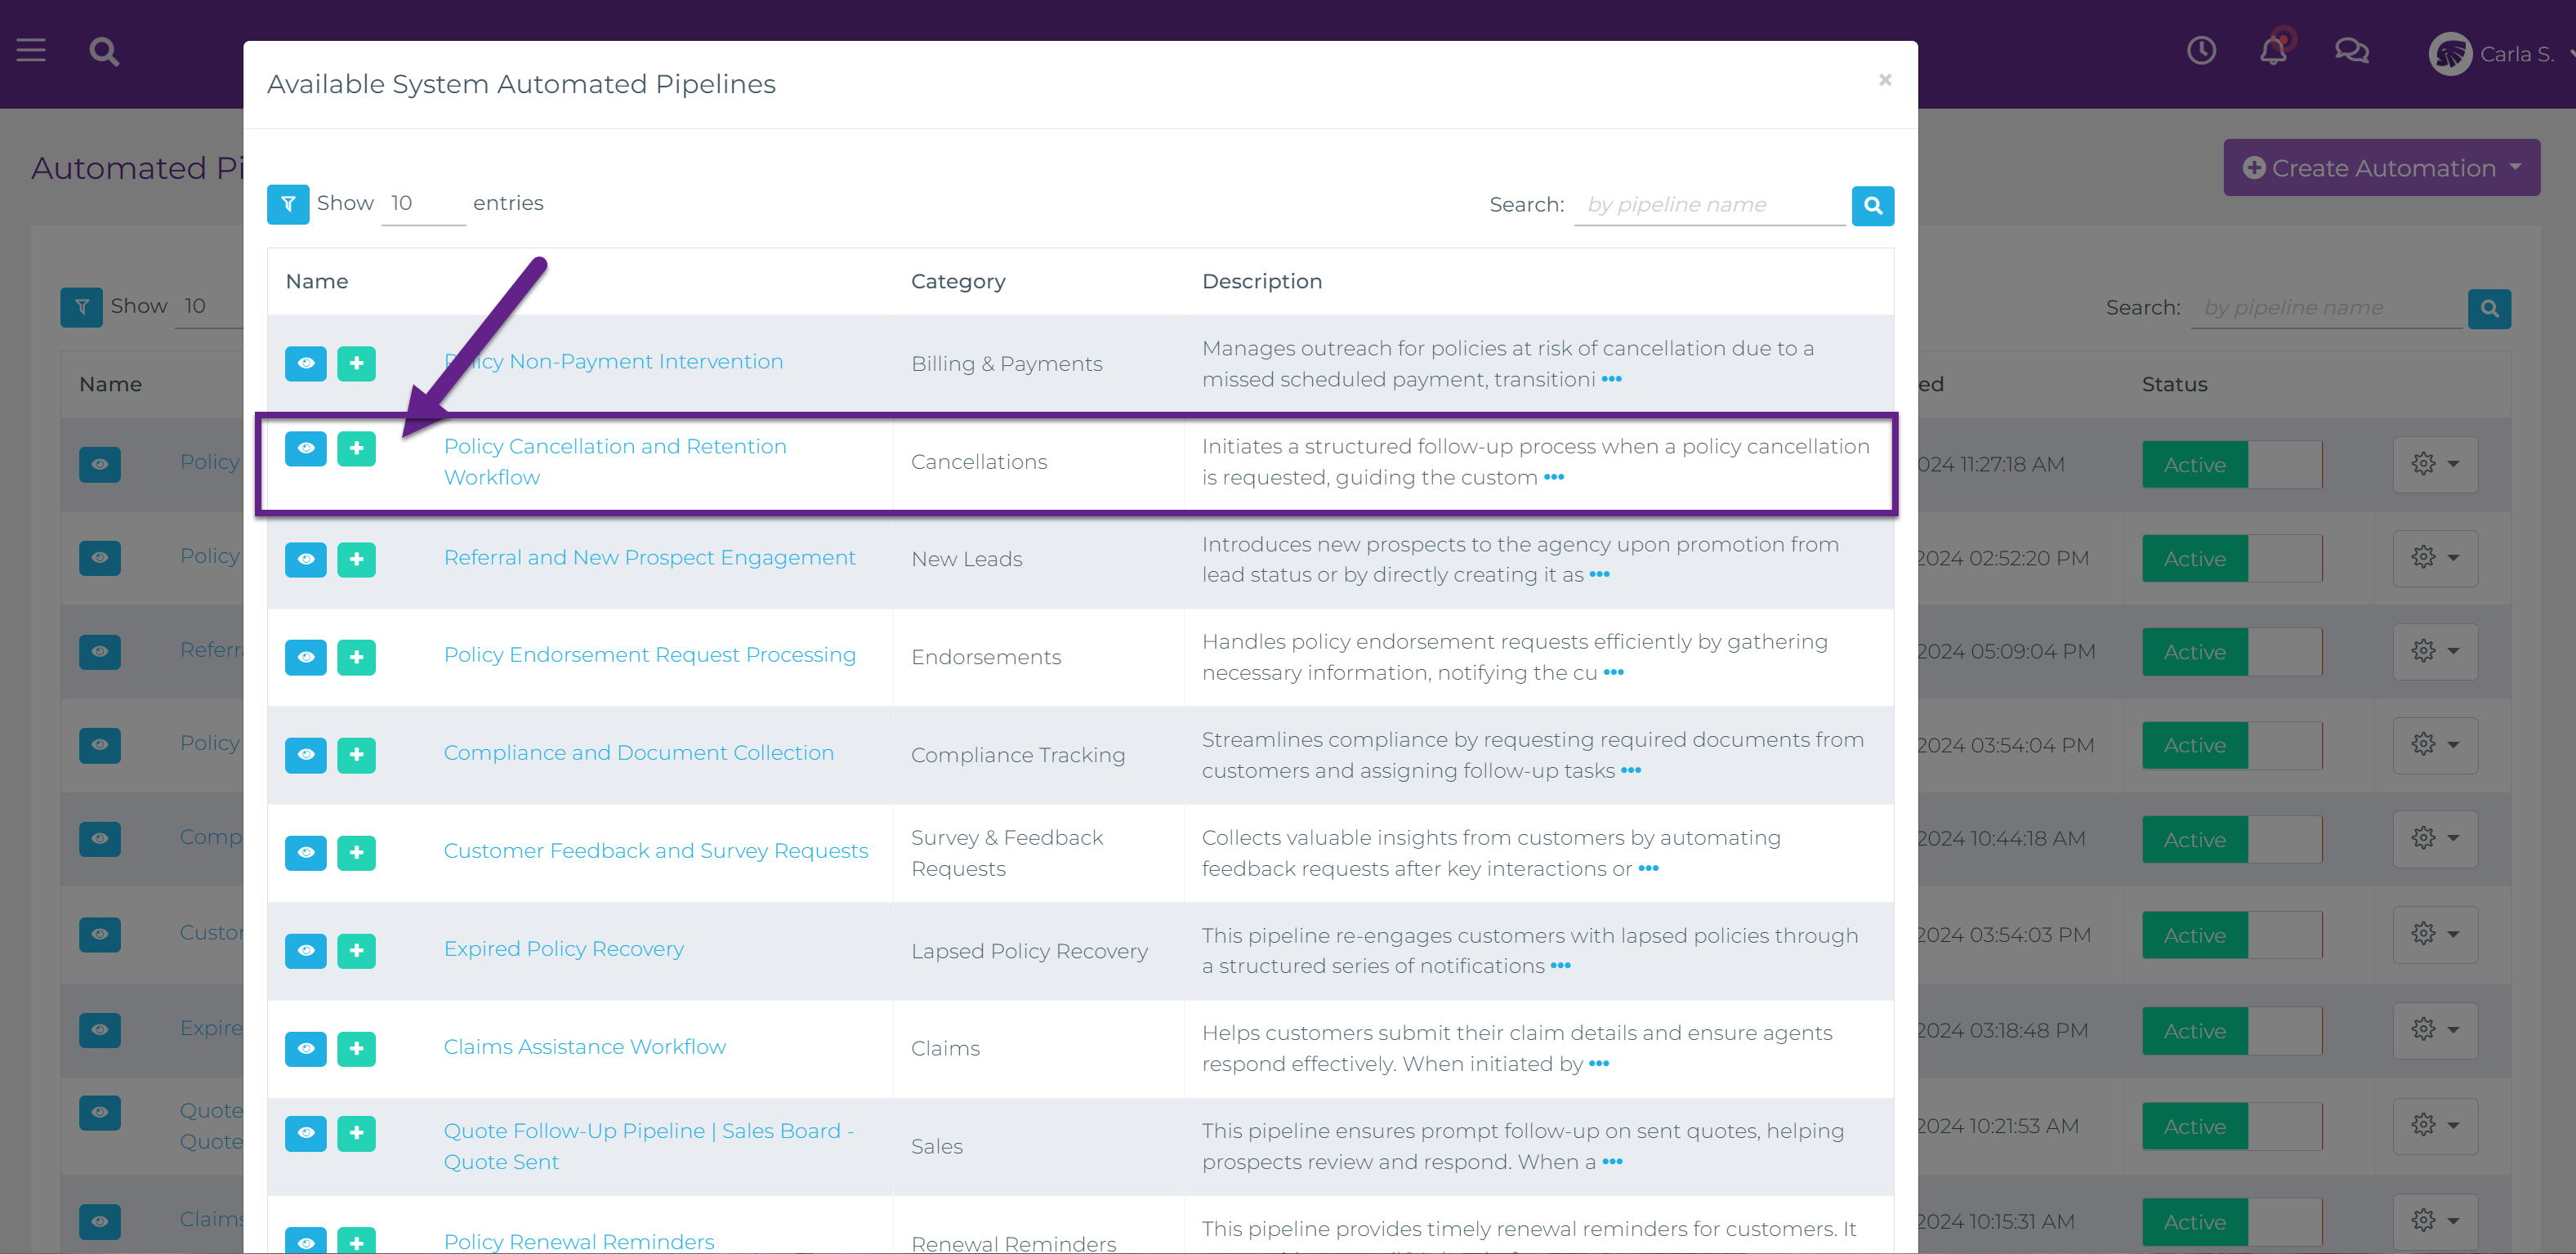
Step 3: Select a System Template
A modal will appear, displaying the list of available pre-built templates for pipelines. Browse the list to find a template that matches your needs, such as Customer Information Confirmation, Quote Request, Compliance Document Submission, Policy Cancellation Request, or Lead Qualification Form. Once you’ve chosen a template, click Add.
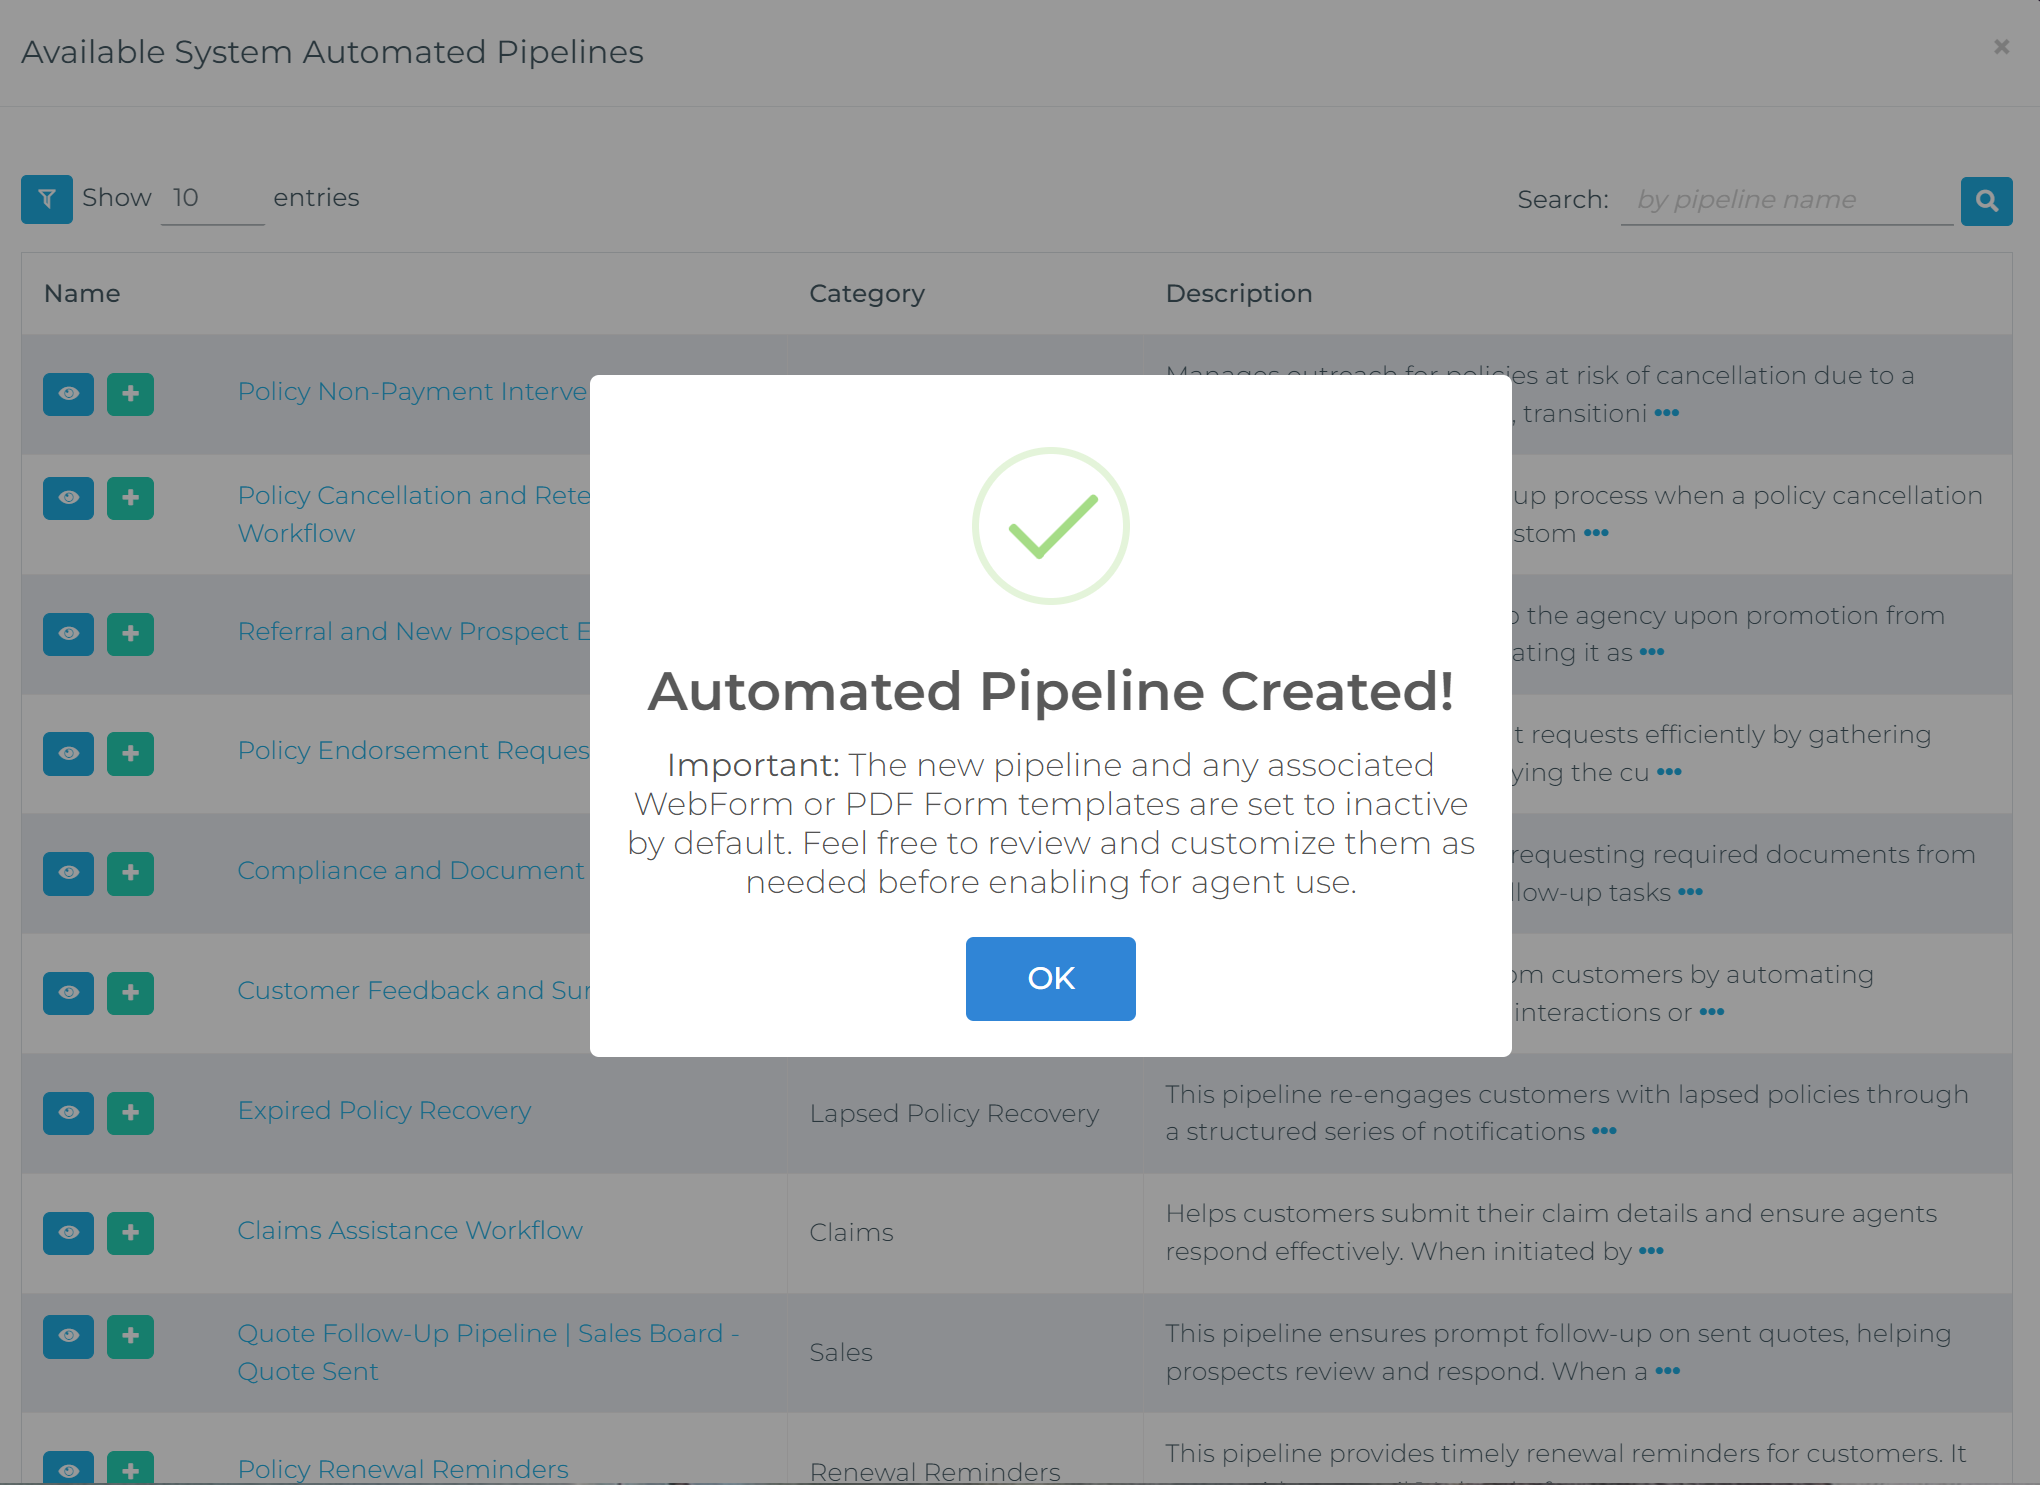
Step 4: Review and Customize the Pipeline
The selected pipeline template is added to your agency’s pipeline list, with a default status of Disabled and a name suffix like “- NEW” to easily identify it as newly added. You can rename this pipeline if needed.
Review the pipeline and make any necessary customizations before activating it. Customization isn’t required unless adjustments are needed to fit specific agency needs. If the pipeline meets your requirements as-is, you can simply proceed to enable it.
If the pipeline includes any associated Web Form Templates (for example, a form for gathering cancellation request details), these forms are also added to your agency’s Web Forms section as Inactive. You’ll find associated forms, such as Policy Cancellation Request, ready for activation once verified.
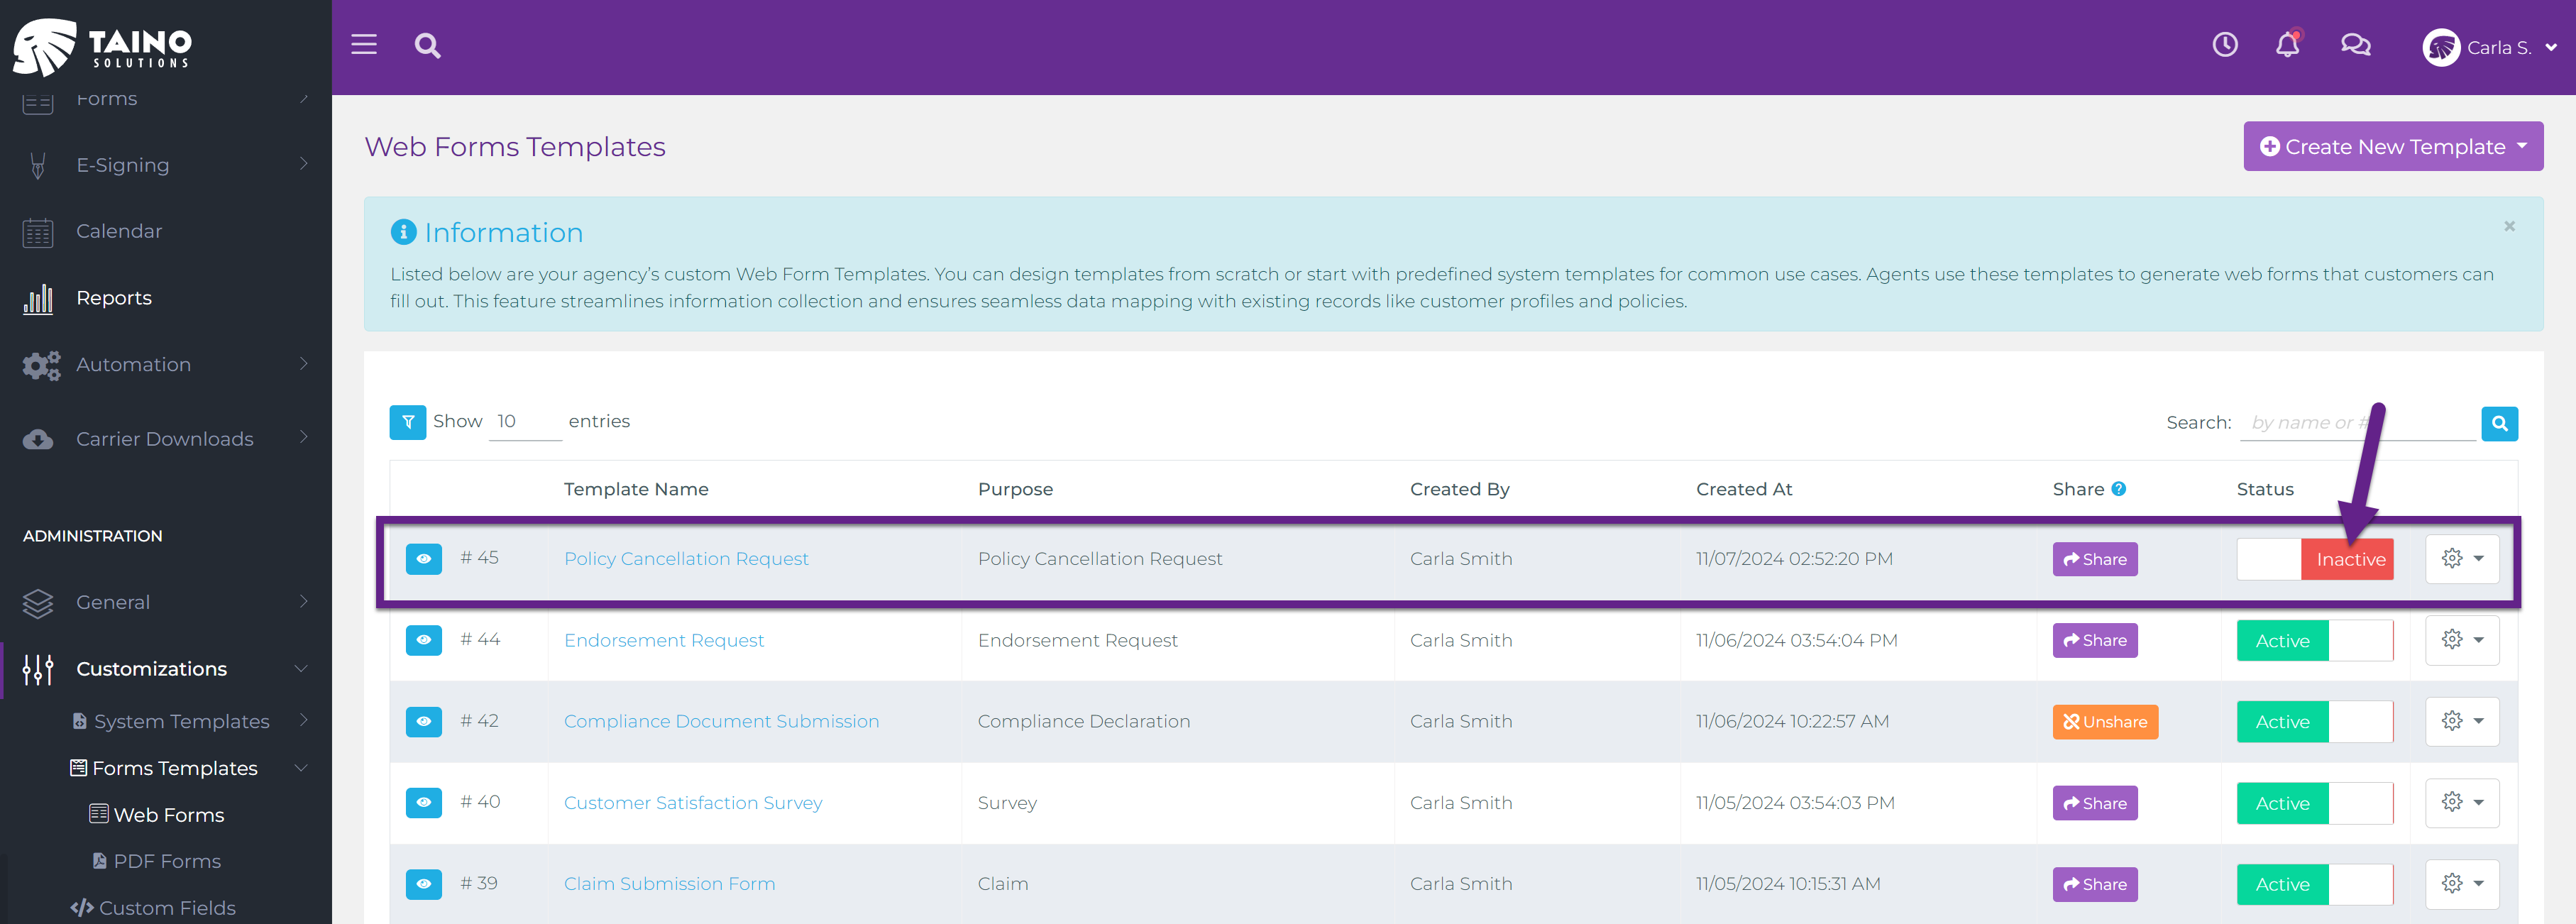
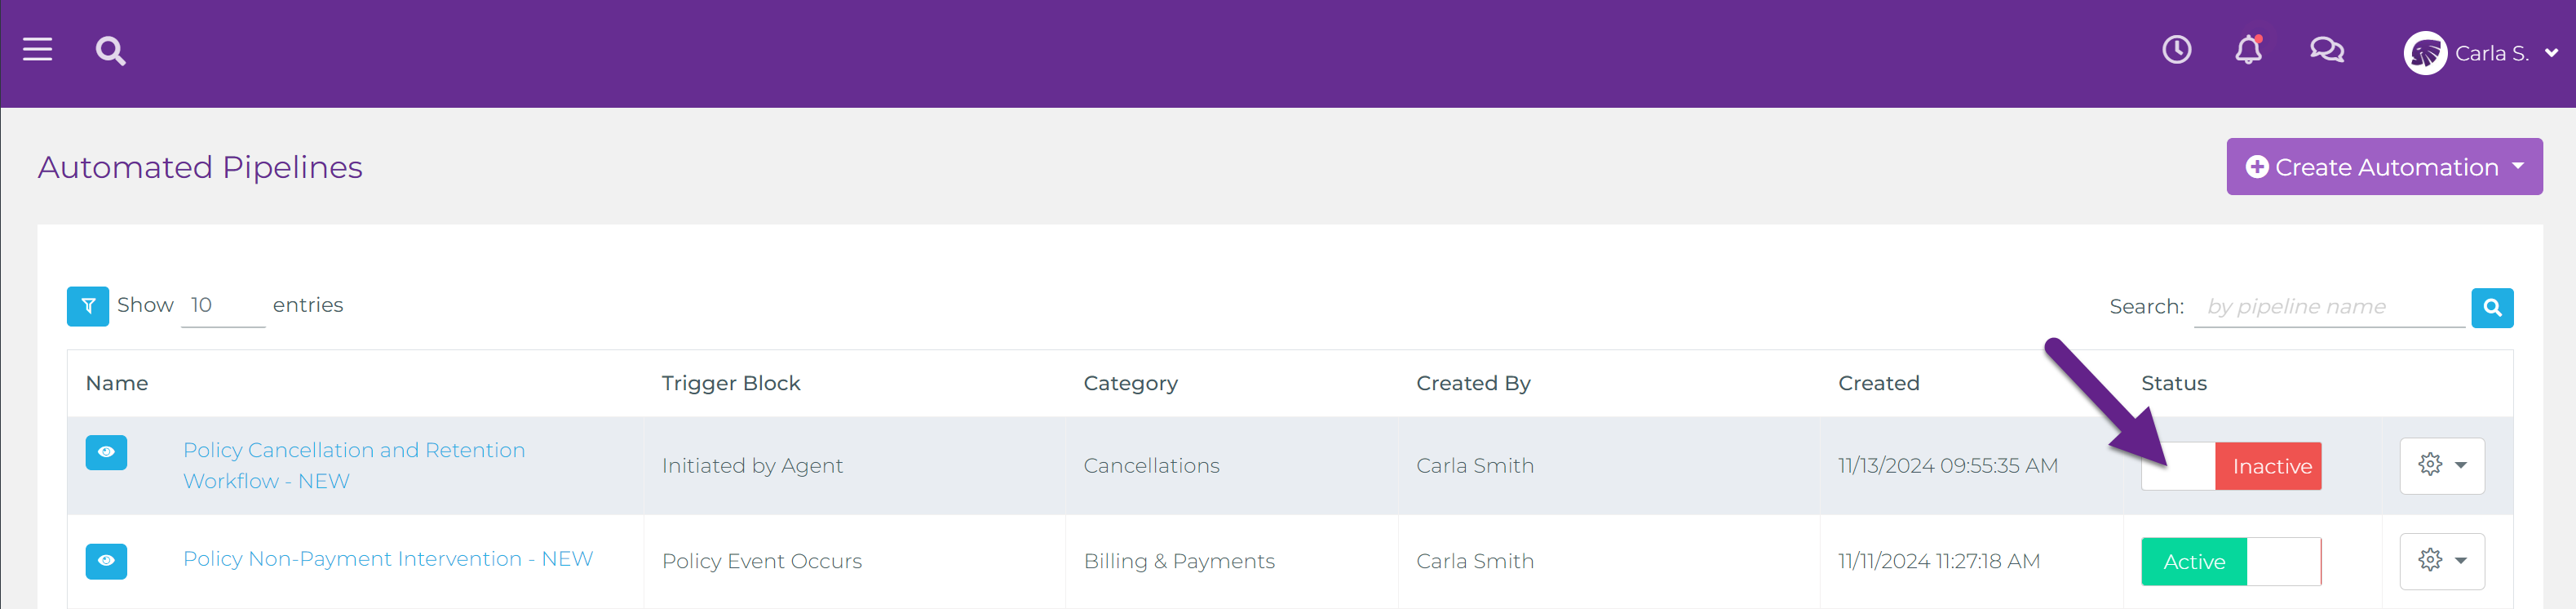
Step 5: Activate the Pipeline and Web Forms
Once you’ve reviewed and, if needed, customized the pipeline, enable it along with any associated Web Forms. To activate the pipeline, simply toggle it to Enabled in the pipeline list. Associated Web Forms, such as Policy Cancellation Request, should also be set to Active in the Web Forms section to ensure they’re ready for use.
Conclusion
Pre-built pipeline templates make it easy to start automating essential workflows in your agency. These templates provide a solid foundation that can be quickly enabled or further tailored to meet your agency’s needs. By activating these templates, you’re setting up efficient processes that support customer engagement and help maximize team productivity.